galette

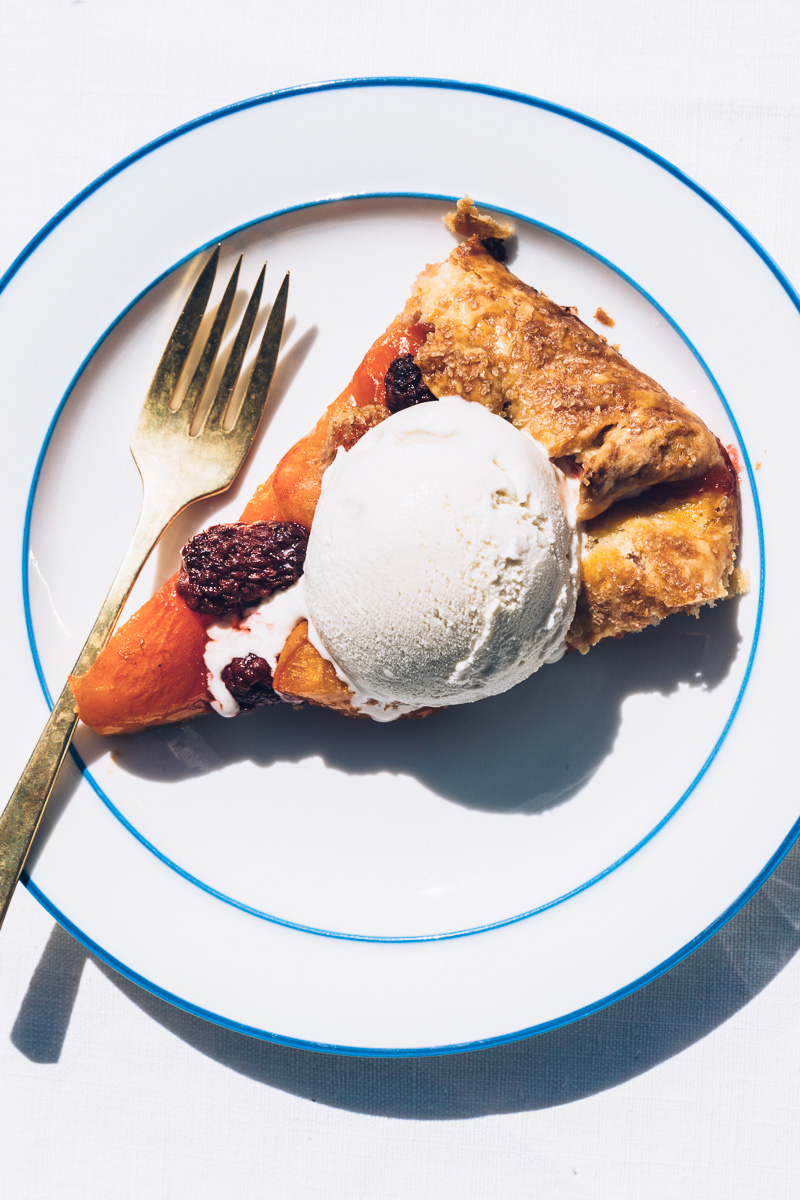
apricot triple berry galette

Image: Olaiya Land

Seattle has bestowed an improbably beautiful June upon us. Normally, it rains right up to (and often through) the Fourth of July. But this year, the days have been bright and warm and the nights perfect for sleeping. My street is fragrant with jasmine and roses bending under the weight of their blooms. The tomato plants in my neighbors' gardens are growing like jungle vines.

The days are magnificently long, too. (I’m writing this at 9.16pm and the sun is only just starting to set). Which means Beau and I have been fixing simple dinners--whatever vegetables we have, thrown on the grill along with a few sausages or maybe a pork chop, and a bottle of rosé--and eating most of our meals outside. This is my idea of summer perfection.

Image: Olaiya Land

Baking has felt decidedly unappealing--all that time and mess and heating up the house when I could be spending time outdoors. But last week at the farmers market, I spied a pile of the season’s first tiny apricots. They were so cute with their downy, blushing cheeks--I couldn’t not buy them. I loaded up my basket and told myself I’d figure out what to do with them later.

Naturally, I let them sit on my counter, until they teetered on the very edge of being usable.

Image: Olaiya Land
Image: Olaiya Land

Then I decided to suck it up and turn on the oven. It was time for a galette. 
 
With their tart, fruit filling and buttery crust, galettes are one of my favorite pastries. Their free-form nature makes them relatively easy to throw together on the fly (and thus perfectly in line with my no-fuss summer cooking policy), especially when made with this super easy galette dough.

Image: Olaiya Land
Image: Olaiya Land
Image: Olaiya Land

After I pulled this beauty out of the oven, all caramelized and bubbling, Beau and I cut ourselves thick slices, topped them with vanilla ice cream and took them outside to eat in the afternoon sun. I didn’t regret turning on the oven or dirtying a few dishes for one second.


Image: Olaiya Land

Apricot Triple Berry Galette

  • ½ recipe Galette Dough
  • 1 lb ripe apricots, pitted and halved if small, quartered if larger
  • 1 ½ cups mixed berries (I used raspberries, golden raspberries and tayberries)
  • 3-5 tablespoons sugar, divided (or to taste)
  • 1 teaspoon cornstarch
  • Salt
  • 1 egg
  • Coarse sugar, such as Turbinado, Demerara or sanding sugar (regular old sugar will work, too)
  • Vanilla ice cream, creme fraiche or sweetened whipped cream, to serve

Preheat the oven to 400°. Line a large rimmed baking sheet with parchment paper. On a lightly floured work surface, roll out the disk of dough to roughly 1/4-inch thickness. Transfer to the baking sheet (the pastry will likely hang over the edges a little bit). Refrigerate the for 10 minutes.
 
While the dough is in the fridge, place the apricots in a large bowl and place the berries in a medium bowl. Add 3 tablespoons of sugar, the cornstarch and a tiny pinch of salt to the apricots. Toss, then taste and add more sugar if your apricots are a bit tart. Add 1 tablespoon of sugar and a tiny pinch of salt to the berries. Toss, taste and add more sugar if your berries need it.
 
Spread the apricots on the pastry to within 2 inches of the edge. Arrange the berries over the apricots. Fold the edge over the filling, pleating as you go. In a small bowl, whisk the egg with a tablespoon of cold water and brush it over the dough then sprinkle with the sugar. (For an extra pretty galette, place it in the fridge or freezer for 15-20 minutes before baking--this keeps it from slumping in the oven.) 
 
Bake in the center of the oven for 50-60 minutes, until golden brown and bubbling. Let the galette cool slightly before cutting into wedges and serving with ice cream, creme fraiche or sweetened whipped cream.
 
Serves 6-8.

Image: Olaiya Land

Galette Dough
13 ¾ oz (3 cups) all-purpose flour
2 tablespoons sugar
1 ¾ teaspoons kosher salt
9 oz (1 cup plus 2 tablespoons  or 2 ¼ sticks) chilled unsalted butter, cut into ½ inch cubes
8 tablespoons (or more) ice water
1 ½ teaspoons apple cider vinegar
 
*Note: This is a tender (as opposed to flaky) dough because it's made in the food processor. It's the most failsafe, forgiving dough I've ever encountered (it's been my go-to for over a decade) and a great place to start if you're nervous at all about working with dough. If you don't have a food processor, you can substitute my pie dough, or use the method described in my pie recipe to rub the butter into the dry ingredients. This will yield a flakier, but equally delicious galette dough.

- This dough can be refrigerated for up to 2 days, or placed in a ziploc bag and frozen for up to 2 months. If frozen, thaw the dough in the refrigerator overnight and soften slightly at room temperature before rolling out.

Image: Olaiya Land

Blend the flour, sugar and salt in a food processor to combine. Add the butter, one piece at a time, using on/off turns. Process until the dough looks like sand with some pebbles in it. Drizzle in the cider vinegar while pulsing the dough. Then add the 8 tablespoons of ice water and blend until moist clumps form. 
 
The mixture should be moist enough to form a dough when you pinch it together. If you have used 8 tablespoons of water and the dough seems dry, give it a few more pulses in the food processor and then pinch off a golf ball sized piece. Squeeze it and see if it wants to come together into a dough. If it’s too crumbly and won’t form a dough, blend in a bit more water, a teaspoon at a time, until the mixture forms a dough when you pinch it together.
 
Turn out the dough onto a large work surface and gather it together into a ball. Do not knead it as this will toughen the dough. Divide it in half with a bench scraper or knife. Form each half into a ball and then flatten each ball into a disk about ¾-inch thick. Wrap each disk in plastic wrap and chill for at least an hour before rolling. (Ok, to be honest, this dough is so forgiving, I’ve rolled it out without chilling it. But that’s only for emergencies. You’ll get a much nicer galette if you chill the dough!)
 
Makes 2 dough disks (enough for 2 galettes).

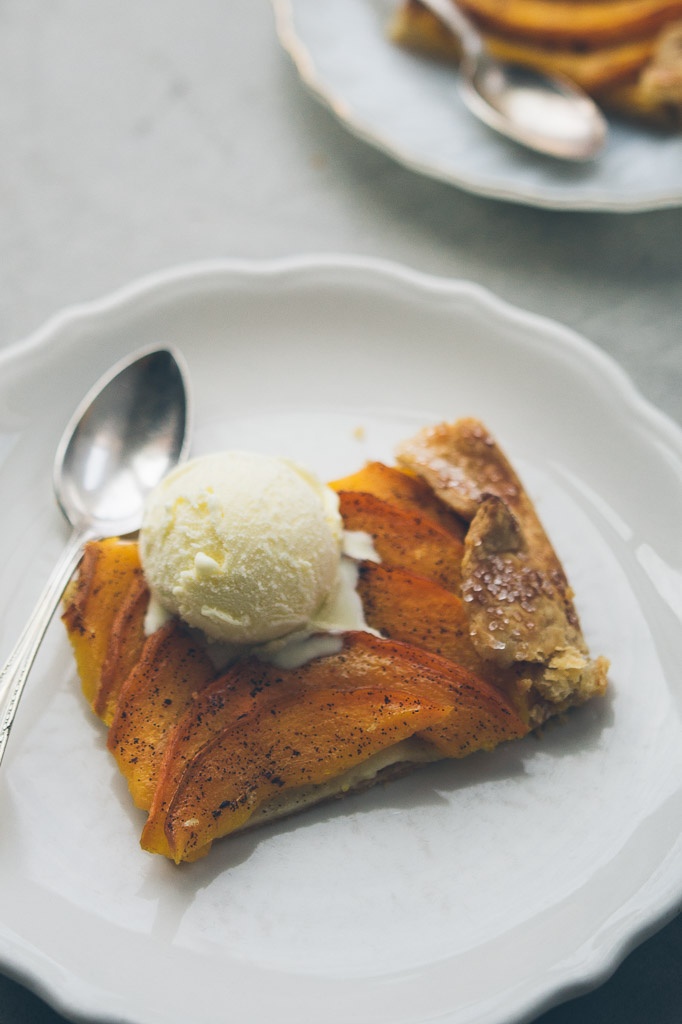
brown sugar pumpkin galette with bay ice cream

brown sugar pumpkin galette on millys-kitchen.com

Ok. I’m going to level with you guys. It’s not always easy to turn out a weekly blog post. As I’m sure you can imagine, I sometimes have zero culinary inspiration and Beau and I end up dining on chili from the hotbar at Whole Foods. Some weeks, taking the time to create, prep and shoot a recipe feels like too much. Not to mention finding something engaging to write about it. Sometimes I just don’t want to. 

brown sugar pumpkin galette on millys-kitchen.com

This week was starting to look a lot like a just-don’t-want-to sort of week. I’ve got holiday gift classes to prepare for and I’m getting ready to launch my next culinary tour. It seems like the majority of my friends have had babies in the last month, so I have a mountain of baby gifts to get in the mail. Thursday’s Thanksgiving, which means shopping and cooking and all that jazz.  

But I’ve had this idea for a pumpkin tart floating around in my head for months. And since there is (obviously) no better moment for a pumpkin tart than the week of Thanksgiving, I figured I’d better get on it. 

brown sugar pumpkin galette on millys-kitchen.com

Pumpkin pie has been my favorite Thanksgiving dessert since forever. Apple pie is nice. Pecan pie, delightful. But pumpkin pie, wreathed in a fluffy halo of whipped cream captured my young heart and has held sway over it ever since. For years, my go-to recipe has been this one, with the spices doubled and a little maple and rum thrown in for good measure. This is my dream pumpkin pie--velvety and rich with a complex spiciness. But I’m not so particular when it comes to pumpkin pie; I eat the samples they hand out at the grocery store with almost as much gusto. With the savory-sweetness of pumpkin, a creamy custard base and the alchemy of cinnamon, nutmeg and cloves, it’s pretty tough to mess up pumpkin pie.

brown sugar pumpkin galette on millys-kitchen.com

That said, I wanted to try something different this year. A riff on the classic. Maybe a little less sweet and with the pumpkin itself playing a starring roll. So despite my just-don’t-want-to state of mind, I pulled out the ingredients for galette dough and headed to the market to select a pumpkin. The next day I queued up several episodes of This American Life and got to work. 

Somewhere around the time the disks of dough were in the refrigerator and my pumpkin was neatly peeled and seeded and sliced, I realized that this chilly Monday morning spent chopping and kneading in my warm kitchen was a pleasure and not a slog. There’s something about the methodical nature of baking that clears my head. It’s precise. And technical. You have to focus on the task at hand, which is it’s own sort of meditation. 

Baking this tart turned out to be the perfect antidote to a mounting tide of pre-holiday stress. And it’s almost as good as the ethereal pumpkin pies I remember from my childhood. 

Wishing you and yours a Happy Thanksgiving, whatever sort of pie you fancy!

xo,

Olaiya


brown sugar pumpkin galette on millys-kitchen.com

Brown Sugar Pumpkin Galette with Bay Ice Cream

  • ½ recipe Easy Galette Dough (recipe follows)
  • One small baking pumpkin (mine weighed 2 ½ lbs), halved, seeded, peeled and sliced ⅓ inch thick
  • ½ vanilla bean
  • 2 tablespoons granulated sugar
  • ¼ cup light brown sugar, loosely packed
  • ¼ teaspoon salt
  • Pinch (1/16 teaspoon) ground allspice
  • Pinch (1/16 teaspoon) ground cloves
  • Pinch (1/16 teaspoon) ground cinnamon
  • 1 1/2 oz (3 tablespoons) butter, room temperature
  • 2 teaspoons rum (optional)
  • 1 tablespoon milk or cream
  • 1 tablespoon sanding sugar (demerara, turbinado or even plain old granulated sugar will work, too)
  • Bay Ice Cream, to serve (recipe follows)

*Note: You can use any winter squash in this recipe. You might want to add a bit more or less sugar depending on which squash you choose (butternut and acorn are sweeter, kabocha is more savory, etc.). Cook times will vary depending on the variety of squash and how thickly it's sliced.

brown sugar pumpkin galette on millys-kitchen.com

Preheat the oven to 400°F. Line a large rimmed sheet pan with parchment paper. Roll out one disk of dough on a lightly floured work surface into a ¼-inch-thick round or oval. Transfer the dough to the sheet pan.  Arrange the pumpkin over the dough, overlapping the slices slightly and leaving a 1 ½-inch border. Place the sheet pan in the freezer for 10-15 minutes. (This keeps the dough from slumping when you bake your galette.)

Use a paring knife to halve the vanilla bean and scrape the seeds out. Place the vanilla seeds in a small bowl with the granulated sugar. Use your fingers to rub the vanilla into the sugar; this will keep it from clumping. Transfer the vanilla sugar to a medium bowl and add the brown sugar, salt and spices. Whisk to combine then rub the butter and rum into the sugar mixture. 

Remove the galette from the freezer. Crumble the brown sugar mixture over the sliced pumpkin. Fold the dough over the pumpkin and lightly brush the edges of the galette with milk or cream. then sprinkle with the sanding sugar. Bake, rotating the galette as necessary for even browning, until the crust is golden brown and the pumpkin is cooked through, about 60 minutes. Cool slightly before slicing and serving with Bay Ice Cream.


Easy  Galette Dough

  • 13 oz (3 cups) all-purpose flour

  • 1 tablespoon sugar

  • 1 ½ teaspoons salt

  • 9 oz (2 ¼ sticks) chilled, unsalted butter, cut into ½ inch cubes

  • 8 tablespoons (or more) ice water

  • 1 ½ teaspoons apple cider vinegar

 
*Notes
: I love, love, LOVE this dough. The food processor does most of the work and it comes together in no time. It is also very forgiving, which makes it a great dough for novice bakers. Unlike my flaky pie dough, which requires a bit more work, this is a tender dough--more like a pâte sablé. If you'd like a flakier crust on your galette, feel free to substitute this dough recipe.

brown sugar pumpkin galette on millys-kitchen.com

- This dough can be refrigerated for up to 2 days or placed in a air-tight plastic bag and frozen for up to 2 months. If frozen, thaw the dough in the refrigerator overnight and soften slightly at room temperature before rolling out.

Blend the flour, sugar and salt in a food processor to combine. Add the butter, processing between each addition using on/off turns, until the dough looks like coarse meal. Gradually add the ice water and cider vinegar and process until the dough just comes together. You may need to add more ice water by teaspoonfuls if the dough is dry.  

Turn the dough out onto a large work surface and gather it together into a ball. Do not knead or you risk toughening the dough. Divide the dough in half with a bench scraper or knife. Form each half into a ball and then flatten each ball into a disk about 1 inch thick. Wrap each disk in plastic wrap and chill for at least an hour before rolling. 
 
Makes 2 disks of dough (enough for 2 galettes).


Bay Ice Cream

  • 1 3/4 cups heavy cream

  • 10 black peppercorns (whole)

  • 6 Turkish bay leaves (fresh or dried)

  • 1 cup whole milk

  • 3/4 cup granulated white sugar, divided

  • Pinch fine grain sea salt

  • 4 large egg yolks


*Note: This ice cream will keep for up to a week, though the texture is best on days 1-3. After that it can get a little grainy, especially if you open and close your freezer a lot. 

brown sugar pumpkin galette on millys-kitchen.com

Place the cream and peppercorns in a medium saucepan and place over medium heat. If you’re using fresh bay leaves, slice each into 4 or 5 pieces and add to the pot. If you are using dried bay, crush the leaves a little before adding them to the pot. When the cream comes to a bare simmer, remove the pot from the heat, cover and set aside to steep for 40 minutes. When the cream has infused, pour it through a fine mesh sieve into a small bowl. Discard the bay and peppercorns. 

Prepare an ice bath by filling a large mixing bowl half full of ice and then just covering the ice with cold water.

Return the strained cream to the pot along with the milk, ½ cup of the sugar and salt. Heat over medium heat, stirring occasionally, until the mixture reaches a bare simmer. Do not boil. 

Whisk the egg yolks and remaining ¼ cup sugar together in a medium bowl. Gradually warm the eggs by adding the cream mixture in a thin stream while whisking. Return the egg and cream mixture to the saucepan. Cook over medium-low, stirring constantly with a flexible heatproof spatula (be sure scrape the bottom and corners of the pan so the custard doesn’t scorch) until the mixture coats the back of spoon like this. If you’re more of a technical cook, the custard should register between 170 to 175°F on an instant-read thermometer. Do not let the custard boil or it will break and look grainy. 

Immediately strain the thickened custard through a fine-mesh sieve into a large bowl set over the ice bath and whisk to cool. Transfer the cooled custard to the fridge and chill for at least 6 hours (overnight if possible--the colder your base is, the smoother your ice cream will be). Freeze the custard in an ice cream maker according to the manufacturer’s directions then transfer to an airtight container and place  in the freezer to harden, at least one hour.

Makes about 1 quart.

brown sugar pumpkin galette on millys-kitchen.com