condiments

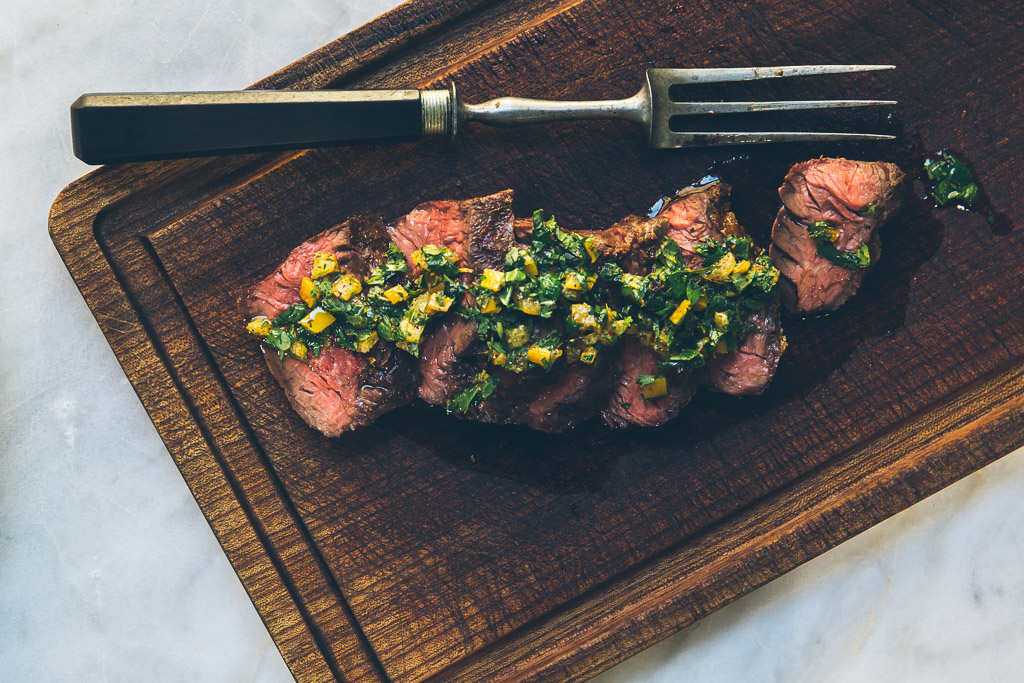
grilled hanger steaks with asparagus, spring onions and preserved lemon relish

grilled hanger steak with asparagus, spring onions and preserved lemon relish via millys-kitchen.com

If you’ve been following along here for a while, you know I’m someone who loves to make unrealistically grandiose plans. I’ve got list upon list brimming with big ideas for improving the house, the yard, this blog, my photography skills, my wardrobe and my general person (among other projects).

I’m itching to completely tear up the yard of our new house and transform it into the just-unkempt-enough cottage garden I’ve been dreaming of for over a decade. I want to rip out the kitchen floor, teach myself to lay tile and put down handmade hex tile from Morocco. I want to browse Pinterest from top to bottom until I finally find THE haircut for my unruly curls. I want to get up at dawn every morning to catch the day’s first rays with my film camera. I want to string lights from the trees in our backyard and host large, raucous dinner parties every weekend.

grilled hanger steak with asparagus, spring onions and preserved lemon relish via millys-kitchen.com

A past version of me would be spending the evening mapping out my plan of attack for all these summer projects rather than writing this blog post. There would be lots of lists and diagrams. Maybe even a full-on crazy wall like the ones you see in the movies with maps and mysterious photos and lots of zig-zagging red string.

But I’ve got a different plan this year. My plan is something called Operation Summer Simplicity. It involves letting the yard and garden do their thing for a season to see what’s what. It involves living with the perfectly fine kitchen floor I have until I decide what I really want. It involves occasionally getting up early to shoot with my film camera. Operation Summer Simplicity is all about leaving enough space in my days that I can actually enjoy the one truly phenomenal season we get here in Seattle. 

grilled hanger steak with asparagus, spring onions and preserved lemon relish via millys-kitchen.com

While I’m pretty sure there won’t be a weekly dinner club happening in my back yard, having friends over for an al fresco meal is one of the highlights of summer for me. To that end, I’ve decided I need an uncomplicated approach to hosting dinners here at the house. That’s where my trusty Weber grill comes into play. Fire it up, throw on a beautiful cut of meat and some seasonal vegetables, uncork a bottle of wine and you’re doing summer right. 

So know this, friends: if the weather is warm and you come to my house for dinner, you will very likely be eating something from the grill. Something like this Hanger Steak with Asparagus, Spring Onions and Preserved Lemon Relish, for example.

grilled hanger steak with asparagus, spring onions and preserved lemon relish via millys-kitchen.com

I had a chance to test this recipe out a couple weeks ago when our friends Alex, Kelsey, Carlos and Susanna came over for dinner on an unseasonably warm evening and I have to say it was perhaps the easiest, breeziest dinner party I’ve ever thrown. Of course that's partly because we had invited some of our chillest friends. But I'm going to give the Weber credit for the rest. Score victory number one for Operation Summer Simplicity. 


Grilled Hanger Steaks with Asparagus, Spring Onions and Preserved Lemon Relish

  • 2 hanger steaks, about one lb. each, patted dry with paper towels
  • Coarse sea salt
  • 1 ½ lbs asparagus (buy the fatests stalks you can find so they don't fall through the grill grate)
  • 6-8 thin spring onions
  • Extra virgin olive oil
  • 1 recipe Preserved Lemon Relish (see below)
  • Special equipment: a corded instant-read thermometer

*Notes: Ideally you want to salt the steaks at least 4 hours before you intend to grill them. If you forget or don’t have enough time, it’s not the end of the world, but salting the steaks in advance helps to season and tenderize them, so it’s worth the extra step. The steaks can be salted up to 24 hours in advance. 

- A corded instant-read thermometer may seem fussy, but unless you’re a professional, it’s really the only way to cook your steak perfectly every time. Bonus: you won’t have to open the oven door or grill lid a gazillion times and let all the heat escape while you’re cooking.

- Here's a great list of tips for grilling. Here's another.

grilled hanger steak with asparagus, spring onions and preserved lemon relish via millys-kitchen.com


At least 4 hours before you intend to grill the steaks, sprinkle them very generously with about 2 teaspoons of salt each. Lay the steaks on a plate and place them, uncovered, in the refrigerator. If you think of it, turn them over once or twice while they're hanging out in the fridge. This allows the surface to dry out more, which leads to better browning on the grill. Remove the steaks from the refrigerator about an hour before you intend to grill them and let them sit at room temperature.

Snap the woody ends off the asparagus and place them on a rimmed sheet pan. Trim any wilted ends from the onion greens. If they're long cut the green tops off the onions along with a bit of the pale green or white part to hold them together. Cut the hairs from the root-end of the onions, but leave enough of the root to hold the onions together. Cut the bulb end in half lengthwise if it's thick. Place the onion tops and bulbs on the sheet pan with the asparagus, keeping them separate. Pour enough olive oil on the asparagus and onions to coat them well and use your hands to rub the oil onto the vegetables, especially the tips of the asparagus. Generously sprinkle with salt.

Use your hands or a silicone pastry brush to generously coat the steaks with oil. Insert the thermometer into the center of one of the steaks. Take care not to angle it up or down or you'll get a false reading.

grilled hanger steak with asparagus, spring onions and preserved lemon relish via millys-kitchen.com

If you are using a gas grill: Light your grill. Turn all the burners to high and preheat the grill with the lid down until it is very hot, 10-15 minutes. 

Place your onions on the grill and cook without turning until they have nice char marks on one side and are starting to soften, 3-5 minutes depending on how hot your grill is. Turn the onions over then place your steaks and asparagus on the grill. Cook the asparagus, turning as needed until they are lightly charred and cooked through. The cook time for your asparagus will vary depending on their thickness. Check them often and take care not to let them get soggy, the goal is bright green, crisp-tender stalks. Remove the asparagus to the sheet pan when they’re done. Continue to cook the onions, turning as needed until they are soft and cooked through then place them on the sheet pan with the asparagus.

Cook your steaks until they are nicely browned and char marks appear on one side, about 2-4 minutes. Turn the steaks and cook until char marks appear on the other side, about 2-4 minutes more. Turn all the burners to medium-low, close the lid on the grill and continue to cook until the steaks reach 115° for rare, 120-125° for medium-rare or 130°-135° for medium. (The steaks will continue to rise in temperature as they rest.) Remove the steaks from the grill and rest for 5 minutes. Slice steaks and serve with grilled vegetables and Preserved Lemon Relish.

If you are using a charcoal grill: Build a 2-level fire in your grill like this (scroll down to number 5). Once your coals are hot and covered in ash, set the grill rack in place, cover the grill and let the rack heat for about 5 minutes.

When the grill rack is hot, grill your veggies as above. When they are almost done, move them to the cooler side of the grill to finish cooking, then place your steaks on the hotter side of the grill. Remove the vegetables to the sheet pan when done. Cook the steaks, uncovered, until they are nicely browned and char marks appear on one side, about 2-3 minutes. Turn the steaks and cook until char marks appear on the other side, about 2-3 minutes more. Move the steaks to the cooler half of the grill and continue to cook to desired doneness (see temperatures above). Remove the steaks from the grill and rest for 5 minutes. Slice steaks and serve with grilled vegetables and Preserved Lemon Relish.

Makes 4 servings.


Preserved Lemon Relish

  • 2 preserved lemons

  • 4 teaspoons finely grated lemon zest

  • ¼ cup cilantro leaves, chopped

  • ¼ cup mint leaves, chopped

  • ¼ cup parsley leaves, chopped

  • 1 teaspoon black pepper

  • ½ teaspoon chile flakes, or to taste

  • 1 cup extra virgin olive oil

  • Sea salt, to taste

grilled hanger steak with asparagus, spring onions and preserved lemon relish via millys-kitchen.com

Run the lemons under cold water to remove excess brine then quarter them. Scoop out the flesh with a spoon and discard. Finely chop the preserved lemon skin and place in a small bowl. Add the rest of the ingredients except the salt and stir well to combine. Taste and add salt if necessary. (Some preserved lemons are salty enough you won't need to add salt.)

Makes about 1 1/2 cups.

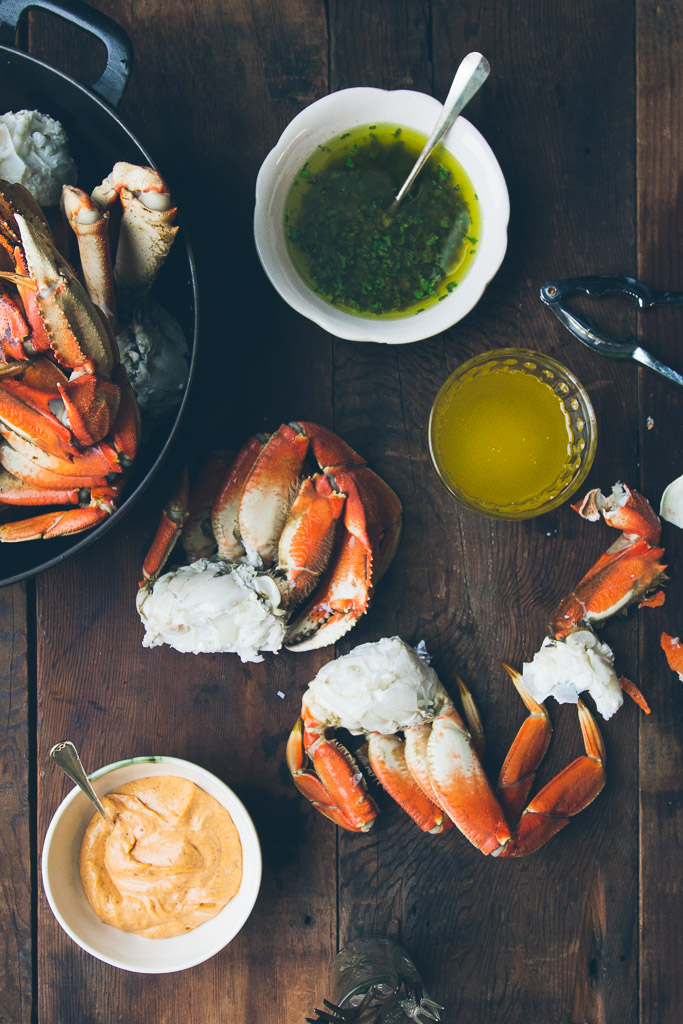
cracked crab with three sauces

cracked crab with three sauces on millys-kitchen.com

I am currently knee deep in boxes and bubble wrap. On Monday, Beau and I signed a stack of papers that was at least two inches thick, which made this whole house buying business feel awfully real. The keys to our little bungalow will be in our hands tomorrow.

As you can imagine, I haven’t had much time to cook. Beau and I have been subsisting on scrambled eggs with whatever vegetables we have rolling around in the fridge and a couple tablespoons of Boursin thrown in. (On a side note: If you’re going to eat the same meal over and over again, I highly recommend this one. Scrambled eggs with Boursin is pretty sexy and it only takes five minutes to make!)

So, as I was saying, packing and paper-signing and calling movers and selling a ton of crap because our new house is smaller than this one hasn’t left me a ton of time to cook. But tomorrow is New Year’s Eve and I couldn’t imagine leaving you without a recipe for ringing in the new year!

cracked crab with three sauces on millys-kitchen.com

May I propose the Cracked Crab Supper. This is our annual Christmas Eve meal, but it would make an equally fine New Year’s Eve spread. I look forward to cracked crab all year. We cover the table in newspaper, boil up a huge pot of Dungeness and serve a variety of sauces alongside. Everyone gets a crab cracker and a pick. Plates are strictly forbidden. After the meal, we roll the whole glorious mess into the newspaper and trot it out to the compost. Done and done. (Did I mention I love this supper?)

cracked crab with three sauces on millys-kitchen.com

Fresh Dungeness bathed in melted butter feels quite luxurious. There’s also something about having permission to eat with your hands that feels  just a little bit naughty. Throw in a bottle (or ten) of champagne and you have the perfect meal for a New Year’s Eve gathering!

I wish you all a delicious end to 2015. And I look forward to writing you next from a new house and a new year!

xo,

Olaiya


Cracked Crab with Three Sauces

  • 6 Dungeness crab, 2-2 ½ lbs each
  • 1 recipe Sauce Verte (see below)
  • 1 recipe Spicy Smoked Paprika Aioli (see below))
  • 1 recipe Drawn Butter (see below)
  • 2 lemons, cut into wedges
  • Several pounds of ice

*Notes: For everything you ever wanted to know about cooking and cleaning Dungeness crab, I refer you to my friend Becky’s excellent tutorial. She is a fantastic chef and knows pretty much everything there is to know about sustainable seafood. 

- If you would rather not cook live crab, you might be able to sweet talk your fishmonger into killing and cleaning it for you in the shop. Take it home and cook it immediately as the meat deteriorates quickly. Of course, you can always buy pre-cooked and cleaned crab from the store, but it's never as delicious as freshly-cooked. 

- Some people serve whole crab and have their guests clean them at the table. I find this a little off-putting (read: gross) for those who are not die-hard crab lovers and seafood aficionados. I prefer to clean the crab and remove the innards before serving.

- The crab can be cooked up to 6 hours in advance. Store in the refrigerator until you’re ready to serve it.

cracked crab with three sauces on millys-kitchen.com

Heat a large pot of generously salted water over high heat. If you do not have an extremely large pot, you will need to cook the crab in batches.

While the water is heating, fill a large bowl or pot (or a clean sink) with ice. If you are cooking the crab in batches, be sure to save some of the ice for the rest of the crab.

When the water comes to the boil, place as many crab as will fit in the pot. Be sure they are completely submerged. Bring back to the boil and cook for 15 minutes. Transfer the crab to the ice and cover with cold water. This will stop the cooking. Once completely cold, remove the crab from the ice water. Clean the crabs if you didn’t have your fishmonger do it. Dry thoroughly and store in the refrigerator if not serving immediately. 

If you want to eat your crab cold (like we do), just take it out of the fridge about 20-30 minutes before you plan to serve it to let it warm up a bit. 

If you want to eat it hot, steam the crab for 5-10 minutes just before serving. The time will vary depending on how large your crabs are and how cold they are when they go in the pot. Taste the meat often as you steam the crab to be sure you don’t overcook it.

Serve crab accompanied by sauces and lemon wedges.

Serves 6-8.


cracked crab with three sauces on millys-kitchen.com

Sauce Verte

  • 1 cup parsley, chopped fine

  • 1/2 teaspoon thyme, chopped fine

  • 1 tablespoon finely chopped chives

  • 1 small clove garlic, minced

  • ¾ cup olive oil

  • 1 tablespoon capers, chopped

  • 2 ½ tablespoons lemon juice

  • Salt, to taste

Combine all the ingredients in a small bowl and stir to combine. Adjust seasonings to taste. Transfer to small bowls and serve alongside the crab. This sauce doesn't hold particularly well, so I recommend making it no more than an hour or two before you intend to serve it. 

Makes about 1 cup.


Spicy Smoked Paprika Aioli

  • 1 cup mayonnaise, preferably homemade

  • 2 garlic cloves, grated on a microplane or minced

  • 1 -3 teaspoons lemon juice, depending on whether your mayo already has lemon or vinegar in it

  • ¾ teaspoon smoked paprika

  • ¼ teaspoon cayenne, or to taste

  • Pinch fine grain sea salt

Combine all the ingredients in a small bowl and whisk to combine. Adjust seasonings to taste. Transfer to small bowls and serve alongside the crab. This aioli can be made up to 2 days in advance and will get spicier as it sits. Store, covered, in the refrigerator.

Makes about 1 cup.


cracked crab with three sauces on millys-kitchen.com

Drawn Butter

  • 8 oz (2 sticks) high quality salted butter

Melt the butter in a small saucepan over medium heat. Once melted, the butter will foam. Skim the foam then pour the butter into a clear heatproof container like a Pyrex measuring cup. Wait for the milk solids to fall to the bottom then carefully pour off the liquid butter, leaving the solids behind. You can use cheesecloth if you want your drawn butter to be extra clear. I usually don’t fuss with the extra step since it wastes some of the butter. Heat the drawn butter in a small saucepan just before serving. Transfer to small serving bowls and serve alongside the crab.

Makes about ¾ cup.


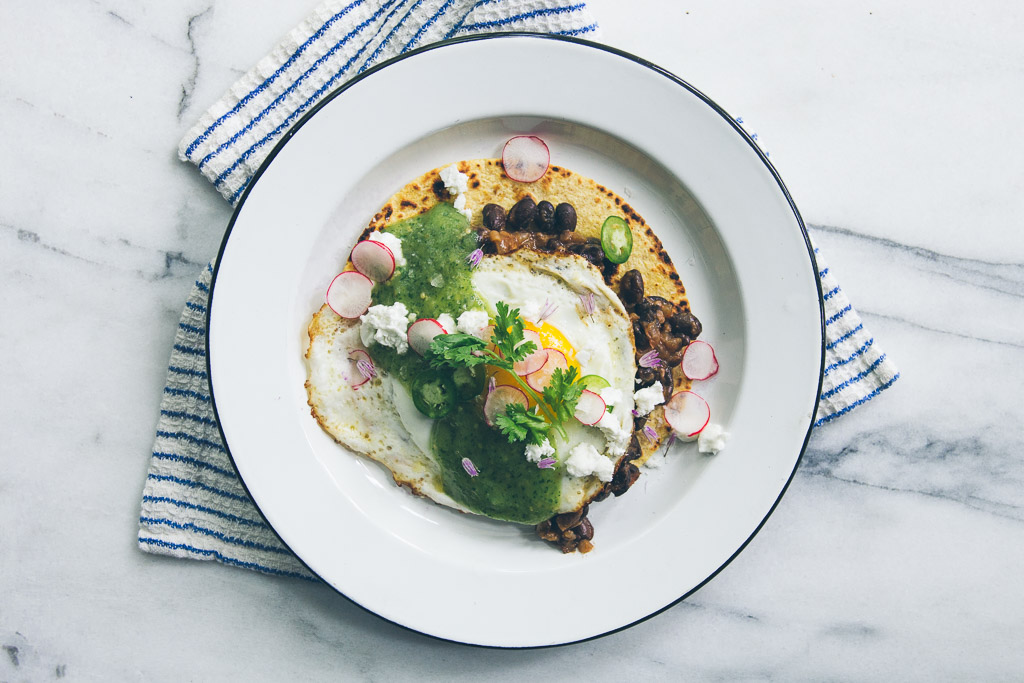
simple suppers: huevos rancheros with salsa verde

huevos rancheros // millys-kitchen.com

I'm a big fan of cooking projects. (Hello from-scratch pie crust and braised octopus!) But I know that even the most adventurous home cook doesn't have the time to pull together a culinary masterpiece at every meal. I definitely don't.

So I'm introducing a new feature here on the blog: Simple Suppers. These are recipes that come together without too much fuss; use fresh, seasonal ingredients and are delicious enough you’ll want to add them to your permanent line-up. They’re the sorts of dishes we eat at my house when I’m not recipe testing or in the mood for a more challenging enterprise.

huevos rancheros // millys-kitchen.com

So without further delay, I give you: Huevos Rancheros! That brunch staple that is oh-so-easy to make, satisfying and infinitely customizable. All of which make it an ideal dinner for one or a fantastic brunch for the whole fam. 

huevos rancheros // millys-kitchen.com

I hope you’ll make this simple supper your own. And I’d love to hear back in the comments what exciting variations you come up with!


huevos rancheros with salsa verde

Huevos Rancheros with Salsa Verde

  • 8 medium corn tortillas
  • 8 large eggs
  • Butter, for frying eggs
  • 1 recipe black beans (see below), warmed
  • 1 recipe salsa verde (see below), warmed
  • Kosher or sea salt
  • 4 radishes, very thinly sliced into rounds
  • 1 serrano or jalapeño pepper, very thinly sliced into rounds
  • Crumbled cotija cheese, to garnish
  • Cilantro leaves, to garnish
  • Chive blossoms, to garnish (optional)
huevos rancheros // millys-kitchen.com

For the black beans

  • 1 tablespoon neutral-tasting oil (I used canola)

  • ½ medium onion, diced

  • Kosher or sea salt

  • 2 teaspoons ground cumin

  • Pinch chili flakes

  • 1 medium tomato, peeled and diced (canned works fine)

  • 1 ½ cups cooked black beans (homemade or canned)


For the salsa verde

  • 1 pound fresh tomatillos, husked, rinsed, and quartered (you can use canned when fresh aren't in season)

  • 1 fresh serrano chile, roughly chopped (remove the seeds for less heat)

  • 1/2 large white onion, roughly chopped

  • 2 garlic cloves

  • 1/2 cup water

  • 1/2 cup finely chopped cilantro

  • 1-2 tablespoons fresh lime juice, or to taste


huevos rancheros // millys-kitchen.com

*Notes: I’m crazy for green sauces with eggs, so my version is topped with a bright, spicy salsa verde (which you should definitely make a double batch of and put on everything you make for the next week!), but a red sauce or even a salsa fresca would be great, too.

The sky’s the limit when it comes to garnishes. Here are a few to try: finely shredded cabbage, sour cream or crema, a melty cheese like pepper jack or sharp cheddar, halved cherry tomatoes, diced onion, sliced green onions or crispy tortilla strips.

I like my huevos rancheros with a fried egg, but poached or scrambled work, too.

Lastly, don't be intimidated by the fact that you need to make beans and salsa for the huevos; they both come together in a snap!


Start by making the beans: Heat the oil in a medium sauté pan over medium heat. Add the onion and a pinch of salt. Reduce heat to low and cook until the onion has softened and turned golden brown, about 10 minutes. 

While the onion is sautéing, make the salsa verde: Place the tomatillos, chile, onion, garlic, water and 1 teaspoon salt in a blender. Process until you have a coarse purée. Transfer the mixture to a large sauté pan and simmer, stirring occasionally, until slightly thickened, 10-15 minutes. Add the cilantro. Taste and season with lime juice (you may not need much if your tomatillos are tart like mine were) and salt. Set aside until you're ready to assemble the huevos.

When the onions for the beans are tender, add the cumin and chile flakes. Cook for 1 minute then add the tomato and the beans. Cover and cook until the flavors come together, about 5 minutes.

To assemble the Huevos Rancheros: Heat a large cast iron or carbon steel pan over medium-high heat.  When hot, cook the tortillas in batches until warmed through. I like a little char on my tortillas, so I leave them on a little longer. Wrap the heated tortillas tightly in aluminum foil and set aside. 

Next fry your eggs. Heat the same pan you used to cook the tortillas over high heat. Add about two teaspoons butter to the pan and swirl. It should melt immediately and start bubbling vigorously, otherwise, your pan isn’t hot enough. Crack 4 eggs into the pan (or as many as your pan will hold) and cook until the edges are lacy and crisp and the whites are completely set, about two minutes. Use a metal spatula to separate the eggs and transfer them to a platter or sheet pan. Repeat the process to fry the rest of the eggs.

When all of the eggs are fried, divide the tortillas among four plates. Top with some of the warm beans. Place two eggs on top of the beans on each plate and season the eggs with a sprinkle of salt. Top the eggs with a generous amount of the warm salsa verde. Garnish with the radishes, sliced chiles, cheese, cilantro and chive blossoms and serve immediately.

Makes 4 servings.

huevos rancheros // millys-kitchen.com

Salsa Verde adapted from Gourmet Magazine