citrus

grapefruit vanilla bean trifle

Image: Olaiya Land

In the dreary days of February, my mind turns to spring dreams. Green grass and tiny daffodils elbowing their way up through the soil. The season's first asparagus stalks and baby morels. Raspberries. Strawberries. Apricots! Easter hams and rhubarb pies.

All of which leaves me feeling rather let down when I come back down to Earth and remember we’re still sailing through the mid-winter doldrums.

Image: Olaiya Land

This is a time of year that requires extra creativity in the kitchen. The novelty of autumn’s bounty of apples, pears and squash is long gone. Tender spring things are still weeks away. And Kale, popular and Instagram-friendly as it is, can only take you so far.

Luckily, this is the month we are given citrus.

Image: Olaiya Land

Jewel-toned citrus in all its shapes and forms is the answer to the culinary blues. Bright and subtly floral, it’s the winter ingredient that tricks our palettes into thinking spring is nearly here. 

Sweet-tart grapefruit is my very favorite member of the citrus family. It's annual appearance at the grocery store never fails to brighten my day. Sort of like a beloved uncle who comes around once a year with bad jokes and pocketfulls of candy. 

Image: Olaiya Land
Image: Olaiya Land

It’s difficult to improve upon a perfectly ripe grapefruit section scooped straight from the rind. But as I looked around our kitchen at the mounting piles of grapefruit, I decided it was time to kick things up a notch and transform my winter citrus bounty into something a touch more fancified. 

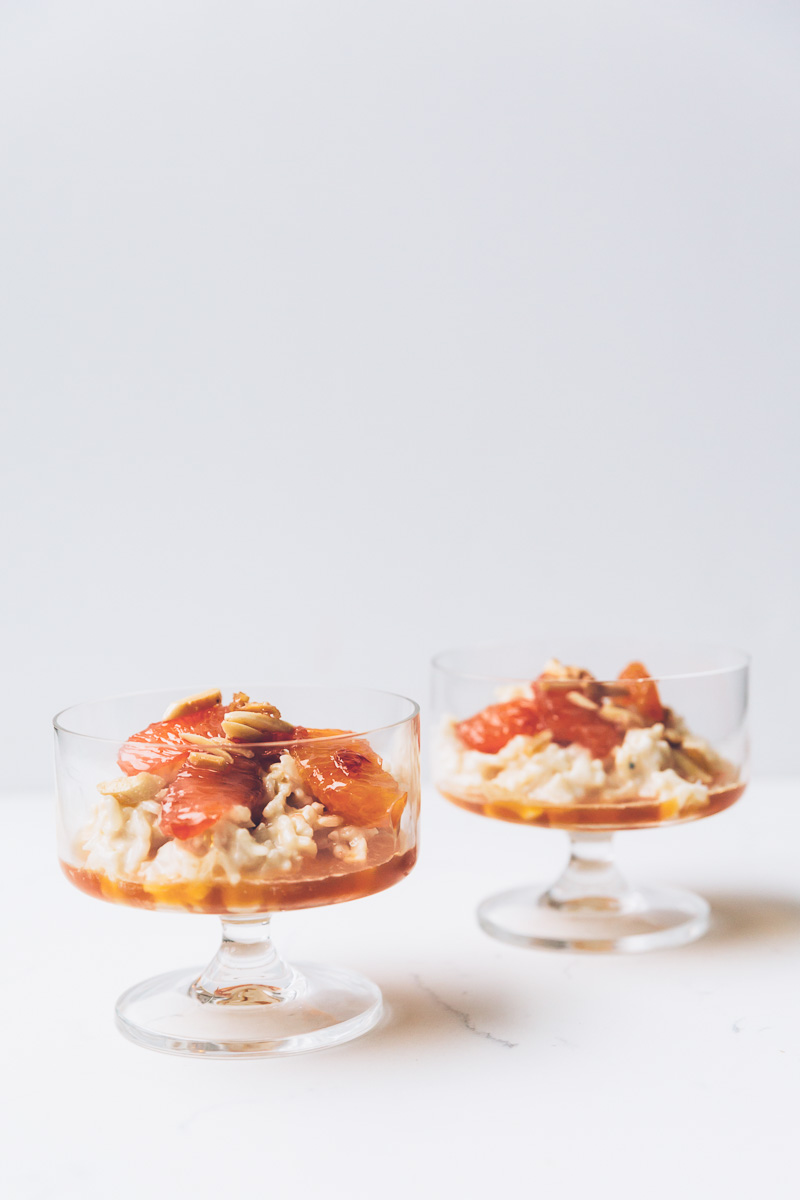
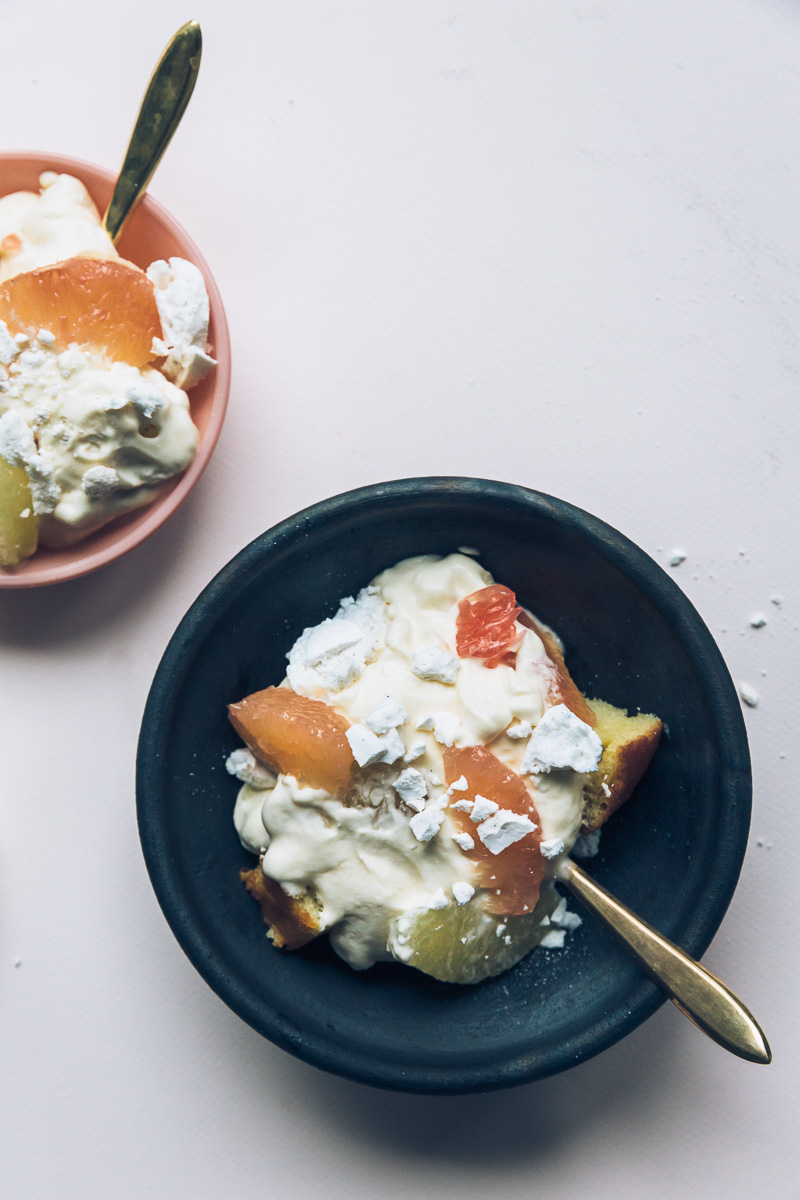
Which leads us to this Grapefruit Vanilla Bean Trifle. It’s a delicious pile of controlled chaos--towering layers of cake, cream, meringue and citrus that collapse into a fluffy, creamy mess when you scoop them into your bowl. This is the sort of dessert that will help you shake off a winter funk. The sort of dish that will make you forget winter all together.

At least until you reach the bottom of the trifle dish.

Image: Olaiya Land

Grapefruit Vanilla Bean Trifle

  • 5 large, ripe grapefruit (I used a mix of red, pink, gold and white grapefruit)
  • 3 cups heavy cream
  • 2 tablespoons sugar
  • 1 recipe Grapefruit Curd, chilled (see below)
  • 1 recipe Vanilla Bean Meringues (see below)
  • 1 recipe Grapefruit Olive Oil Cake, cooled completely (see below)


*Note: This trifle is most beautiful right after you assemble it, before the citrus can release any juices. But it is about a gazillion times more delicious the next day. I recommend you make this a day in advance and store it covered in the fridge until you’re ready to serve it. Leave off the last layer of meringue crumbles until right before you serve it so they stay crunchy.

- Almost all the components of this trifle can be made in advance. The cake can be baked up to 2 days in advance. The curd can be made up to a week in advance. The merengues can be baked a week or more in advance if you bake them fairly dry and store them in an airtight container. 

Image: Olaiya Land

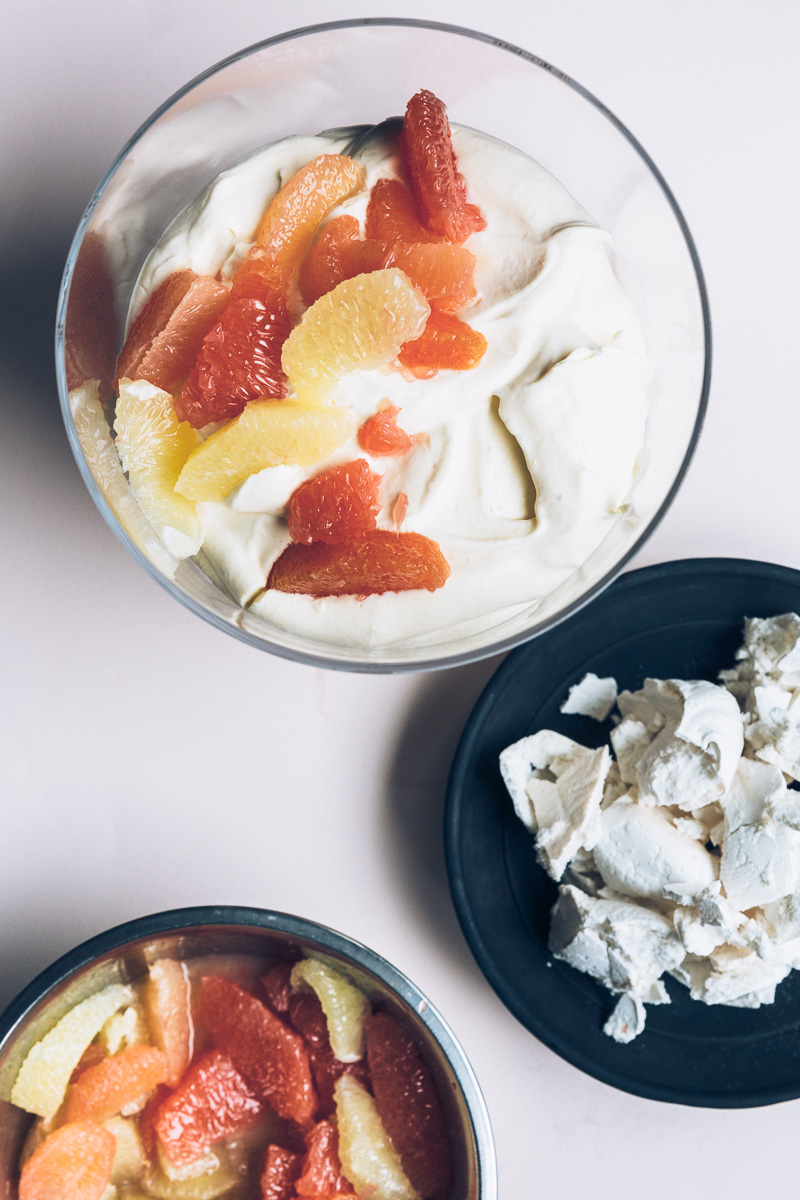
Remove the skin and pith from the grapefruit. Cut the flesh into supremes over a medium bowl so you catch all the juices. (Here’s a video on how to do it.) Set aside.

Place the cream in the bowl of a stand mixer along with the sugar and beat to stiff peaks using the whisk attachment. (You can also use a hand beater or a wire whisk and a mixing bowl.) Take care not to over beat the cream--you want it stiff, but not grainy. Gently fold the chilled grapefruit curd into the whipped cream until only a few faint streaks of yellow remain. 

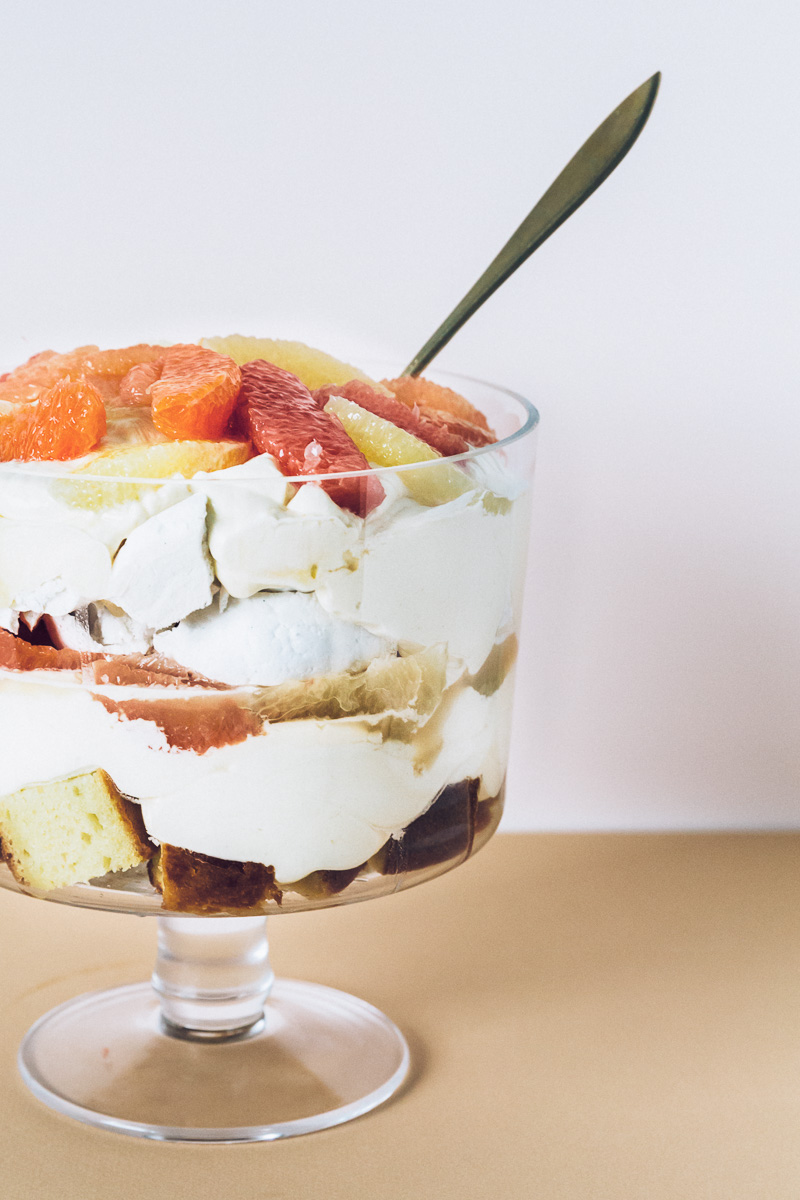
Cut the cooled cake into roughly 1-inch pieces. Arrange the cake pieces in the bottom of a trifle dish or large bowl in a tight layer. Depending on the size of your dish, you may not use all the cake pieces. You can freeze them for another use, or--my favorite option--snack on them alongside your afternoon cup of coffee or tea. 

Spread half the grapefruit cream mixture over the cake. Arrange half the grapefruit sections over the cream. (Take care to lift them from their juices with your fingers or a slotted spoon so the trifle isn’t too wet.) Crumble a layer of meringue pieces over the grapefruit. Spread the rest of the grapefruit cream over the meringue and top with the rest of the grapefruit sections. Crumble additional pieces of meringue over the trifle just before serving.

Serves 8-10.


Grapefruit Curd

  • 1 tablespoon plus 1 teaspoon finely grated grapefruit zest (from 1 large grapefruit--grate an additional 2 teaspoons zest for the olive oil cake, below)

  • ¾ cup freshly-squeezed grapefruit juice

  • ¼ cup plus 1 tablespoon freshly-squeezed lemon juice

  • 1 cup sugar

  • 5 large eggs

  • 4 large yolks (save the yolks from your meringues for this)

  • Pinch kosher salt

  • 10 tablespoons unsalted butter, cut into 10 pieces


Set a fine mesh sieve over a medium bowl and set aside.

Place the juices, zest, sugar, eggs and salt  in a medium heavy saucepan. Whisk well to combine. Cook over medium-low heat, stirring often with a heatproof spatula, until just warm to the touch. Add 1 piece of the butter and cook, stirring constantly with the spatula to prevent scorching, until the butter is almost melted. Repeat with the remaining 9 pieces of butter. 

Continue to cook, stirring often until the curd has thickened and is beginning to bubble, about 1 minute longer. 

Strain the curd into the bowl and discard the zest and any bits of cooked egg. Cool for 15 minutes then place a sheet of plastic wrap directly on the surface of the curd (to prevent a skin from forming) and chill in the refrigerator until very cold, at least 4 hours.

The curd will keep, covered, in the refrigerator for a week or frozen for up to 3 months. Defrost in the refrigerator before serving.

Makes about 3 cups.


Vanilla Bean Meringues

  • 9 oz superfine sugar (about 1 cup plus 2 tablespoons)

  • 1 vanilla bean (I used a Tahitian vanilla bean since they are beautifully floral)

  • 1 1/2 tablespoons cornstarch

  • Pinch salt

  • 6 oz egg whites (from about 5 large eggs)--reserve the yolks for curd

  • 2 teaspoons white wine vinegar


Place a rack in the middle of the oven and preheat to 250° F. Line a rimmed sheet pan with parchment paper. 

Place the sugar in a small bowl. Split the vanilla bean lengthwise and scrape out the seeds with a paring knife. Add the vanilla seeds to the bowl with the sugar. Using your fingers, rub the seeds into the sugar; this will keep the vanilla from clumping together in the meringues. Add the cornstarch and salt. Whisk to combine and break up any clumps.

Using a stand mixer fitted with the whisk attachment, whip the egg whites at medium speed until soft peaks form, 2-3 minutes.

Increase the speed a little and slowly sprinkle in the sugar mixture. It should take you about a minute or more; adding the sugar too quickly or before the eggs form soft peaks will result in a less stable meringue that might spread or weep. A minute or so after all of the sugar mixture has been added, add the vinegar. Increase the speed to medium-high and continue to whip until the meringue forms very stiff peaks, 5-8 minutes longer. You will know the meringue is stiff enough when it will hold the whisk attachment perfectly upright with no other support.  

Spoon the meringue into 6 heaping mounds, each about 4 inches wide on the parchment-lined sheet pan (be sure they aren’t touching). If you want drier, crunchier meringues, use the back of a spoon to flatten each meringue a bit so they are thinner. If you like more marshmallowy meringues, leave them as fluffy mounds.

Bake the meringues until they are crisp and dry to the touch on the outside but still white (not golden or cracked), about 80-90 minutes for flat meringues and about 2 hours for thick ones. Check on the meringues periodically to make sure they aren’t coloring or cracking. If they are, rotate the sheet pan and reduce the oven temperature by 25 degrees.

When the meringues are done, turn off the oven and let the meringues cool completely in the oven. If you're not using them right away, store the cooled meringues in a tightly sealed container (I like a large mason jar). They will keep for a week or two, depending on how dry they are cooked, in a well-sealed container.

Makes 6 large meringues.


Grapefruit Olive Oil Cake
Adapted slightly from Yossy Arefi

  • 1 cup (200g) sugar

  • 1 3/4 cups (225g) all-purpose flour

  • 1 teaspoon baking powder

  • 1/2 teaspoon baking soda

  • 1/2 teaspoon salt

  • 3/4 cup (175ml) fruity olive oil

  • 1/4 cup (55g) unsalted butter, melted and cooled

  • 1 tablespoon finely grated grapefruit zest

  • 4 large eggs, at room temperature

  • 1 cup (240ml) whole-milk kefir or buttermilk, at room temperature (I used kefir)


Follow this recipe, omitting the rosemary and substituting 1 tablespoon finely grated grapefruit zest for the lemon zest.


alison roman's slow roasted pork with garlic, citrus and cilantro

slow roasted pork // image: Olaiya Land

Hello people!

I’m back with the latest installment of the Holiday-Fun-Time-Blog-Party-Extravaganza Megan from Cream + Honey and I have put together for you!  

This week I want to talk about traditions--honoring old ones, creating new ones and ditching the ones that don’t serve us anymore.

Time-honored rituals can provide a comforting sense of continuity. They remind us of family ties and Christmases past. In the things they include and leave out, they contribute to our sense of identity: Are you the sort of person who strings popcorn on the tree while sipping a mug of mulled cider and singing carols? Or the sort of person who decks a Charlie Brown tree in mismatched lights while getting lit on eggnog and watching arthouse holiday films on your laptop? 

slow roasted pork // image: Olaiya Land

I think traditions are great. As long as they make you feel good! But in observing my own life and those of people around me, I see a lot of holiday ties that bind instead of anchor. The season can be filled with a sense of obligation: We buy gifts because we always have. We cook the same meal because that’s the way we’ve always done it. We schlep ourselves and our families from one gathering to the next with barely any time for real connections.

Here’s my radical holiday suggestion: wipe all the shoulds off the slate and only do the things that really gave you joy. Sledding with the kids on Christmas day instead of driving to the in-laws. Skipping the office holiday party to watch old movies on the couch with your special someone. Hiking to a remote cabin in the woods to spend the day in peaceful solitude. Cooking an elaborate multi-course holiday meal with each dish based on one of the Seven Dwarves. Whatever floats your boat!

I know this might feel selfish to some of you. It certainly did to me when I stopped doing all the things I was “supposed to do” for the holidays: give lots of gifts, bake a million cookies, send cards to friends and family, throw an amazing Christmas party. But I’m a big fan of quality over quantity when it comes to time with loved ones. Quality time can only come when we aren’t frazzled and harried and cracking under the stress of a mile-long to-do list.

slow roasted pork // image: Olaiya Land

This year, I’m giving you permission (because sometimes we need that) to ditch the whole host of holiday obligations. Spend some time thinking about what you’d love to do this holiday--whether it's celebrating old traditions, creating new ones or forgoing tradition all together--and follow that instinct. 

And for those of you looking for something festive and decidedly un-traditional to cook this Christmas, I’m nominating this Slow-Roasted Pork Shoulder with Garlic, Citrus and Cilantro from Alison Roman’s magnificent Dining In. If you’ve been following my stories on Instagram, you know I’m in love with this cookbook. I've been cooking out of it like crazy and gifting it to all my favorite people. (If you’re giving gifts this year and have friends who like to cook, this needs to be at the top of your shopping list!) But back to this stunning roast... It’s easy, can be made in advance and would make a brilliant centerpiece for a California- or Mexico-themed holiday supper. Most importantly, it's crazy-delicious.

For more non-traditional-but-super-sexy holiday deliciouness, click on over to Cream + Honey to check out Megan's Potato, Cheddar and Onion Focaccia.

I’m off to pack up all the holiday cookies I baked (a tradition I realized I love once I stopped forcing myself to do it!). I’ll be back next week with more tips for keeping the season fun and bright!

XO,

Olaiya


Alison Roman's Slow Roasted Pork with Garlic, Citrus and Cilantro

  • 1 3 ½ - to 4-pound boneless, skinless pork shoulder
  • Coarse salt and freshly ground black pepper
  • 1 tablespoon neutral tasting high-heat oil (I used avocado oil)
  • 1 orange, halved
  • 2 heads garlic, halved lenghtwise
  • 6 sprigs fresh thyme
  • 3 fresh or dried bay leaves
  • 3 chiles de árbol or 1 teaspoon crushed red pepper flakes
  • 2 tablespoons coriander seeds
  • 1 cup freshly-squeezed orange juice
  • ½ bunch cilantro
  • 4 limes

*Note: Pork can be made 2 days ahead and refrigerated. Heat in a 325° F oven until warmed through.

Preheat your oven to 325° F. 

Season the pork with salt and pepper. Heat the oil in a large, heavy-bottomed pot (with a lid) over medium-high heat. (I used a Dutch oven.) Sear the pork, fat-side down, until it's really well browned, 8-10 minutes. Turn the pork and brown on the other side, another 8-10 minutes. Transfer the pork to a large serving platter or cutting board, and drain the pot of all but 1 tablespoon of the fat.

Add the halved orange and garlic to the pot, cut-side down, followed by the thyme, bay leaves, chiles, and coriander. Cook, stirring for a second, to lightly brown the oranges and garlic. Add the orange juice and 2 cups of water, stirring to scrape up any bits. Return the pork to the pot (the liquid should come a little less than halfway up the pork--add more if it doesn't). Cover and transfer it to the oven.

Roast the pork until it is super tender but not quite falling apart (you want to be able to slice it, not shred it). If you're using a thermometer, this is when the pork reaches around 175-180° F. (Alison states a cook time to 3-4 hours but my 4-pound roast was done in about 2. I'd start checking for doneness at around an hour and a half if I were you.)

Remove the pot from the oven and, using tongs or two large serving utensils, carefully transfer the pork to a cutting board and let it rest for at least 10 minutes. Cut the cilantro stems from the tender tops, tie them together with kitchen twine and add them to the pot with the juices. Cook until the juices have thickened slightly then remove the cilantro stems and discard them.

Slice the pork and place it on a serving platter along with the oranges, garlic and chiles (if desired). Pour the juices over the pork. Slice the limes into halves or quarters and arrange them on the platter for guests to squeeze over their pork. Pick some leaves and/or tender stems from the cilantro tops and scatter over the pork before serving.

Adapted slightly from Dining In by Alison Roman

slow roasted pork // image: Olaiya Land

rice pudding with citrus caramel and candied almonds

rice pudding with citrus caramel and candied almonds || photo: olaiya land

I’ve been thinking a lot lately about not creating extra stress in my life. If you’ve been reading here for a while, you know I’m an anxious person by nature. You also know that I’m a person who loves to start new projects, try new things, collaborate with new people and generally take on challenges. All of which undeniably yields many benefits: new friends, creative satisfaction, travel to distant places, a sense of accomplishment. 

But I’ve realized I cram so many new challenges into my life, I feel like I’m on a crazy roller coaster of stress half the time. I’m either attacking a new project head-on or huddled under the covers with my cat binge watching period films and trying to recuperate. Those have been my two modes recently.

rice pudding with citrus caramel and candied almonds || photo: olaiya land

The other day I paused for moment in the middle of whatever I was doing to check in with myself. I could feel waves of stress radiating through my body. Thoughts zooming. Fingers tingling. Heart banging in my chest. I know this is going to sound ridiculous, but it hit me in that moment that STRESS IS A REAL THING. Like a tangible, physical thing. Not just something you read about being bad for you in some vague sense. But something that takes a toll on your body, like sleep deprivation or smoking. 

In that moment, I decided I’m going to stop creating stress for myself unnecessarily. Some stress is unavoidable (taxes). Some stress is good (getting married). We can’t grow without challenging ourselves. But living in stress is toxic. So I’m trying to be extra mindful of what I say yes to and how I spend my days (which means I might be posting here a little less often). I’m also trying to remember that almost nothing matters as much as we think it does. My photography class homework isn’t perfect! I gained 5 pounds this winter?! She unfollowed me on Instagram!?! All small potatoes when I consider that I have a roof over my head, enough to eat, and people who love me and whom I love.

rice pudding with citrus caramel and candied almonds || photo: olaiya land

I am 100% certain stress will creep up on me when I’m not expecting it. Because I’m human. But I’m pretty excited that so far my less-stress mantra seems to be working. To celebrate, I have a recipe for a creamy Rice Pudding with Citrus Caramel and Candied Almonds for you. Pure comfort food. Like Grandma used to make--but jazzed up with zingy citrus and crunchy almonds. And hopefully a reminder to step back from whatever is stressing us out and fit in a little old-fashioned comfort. 


Rice Pudding with Citrus Caramel and Candied Almonds

  • 1 cup long-grained rice
  • Pinch salt
  • 2 allspice berries, crushed
  • 1 stick cinnamon
  • About 2 cups whole milk
  • 3/4 cup evaporated milk (or substitue whole milk)
  • ¼ cup light brown sugar
  • Heavy cream, to taste (optional)
  • 1 recipe Citrus Caramel (see below)
  • 1 recipe Easy Candied Almonds (see below)

*Notes: The evaporated milk gives the rice pudding extra richness, but feel free to use whole milk or a mix of whole milk and cream instead.

- Top the rice pudding with the caramel just before serving. The acid from the citrus will cause the dairy in the rice pudding to break if you let it sit for long. If this happens, the pudding will taste fine but look a little strange.

rice pudding with citrus caramel and candied almonds || photo: olaiya land

Place the rice in a heavy-bottomed stock pot or Dutch oven along with 1 cup of water, the allspice, cinnamon and salt. Cover and cook over low heat, stirring often, until all the water has been absorbed and the rice is starting to soften, about 10 minutes. If the rice is sticking to the pot, you can add a little more water. 

Stir in the two types of milk and the brown sugar. Cover and continue to cook over low heat, stirring frequently, for about 30 minutes. The rice should be cooked through but still have some tooth to it. Remove the rice pudding from the heat and stir in a few tablespoons of the heavy cream, if using.  Cover and set aside for 15 minutes. The rice will continue to absorb the liquid and firm up a bit. Add a bit more milk or cream if you like your rice pudding a bit looser. Serve warm or cold topped with citrus caramel and candied almonds. 

Makes about 8 servings.

Recipe adapted from Diana Kennedy's Oaxaca al Gusto

rice pudding with citrus caramel and candied almonds || photo: olaiya land

Citrus Caramel

  • 2 blood oranges

  • 1 pink grapefruit

  • 1 navel orange

  • 1 meyer lemon

  • 1 cup sugar

  • 1/4 cup water

  • 2 tablespoons dark rum

  • Pinch salt

*Notes: You can use any mix of citrus you like. I’d avoid going very heavy on lemons, limes or meyer lemons, but a few thrown in provide a nice contrast to the sweet caramel.

- This will keep for 3 days, covered and refrigerated. It’s also delicious on cake, pancakes, ice cream, yogurt or ricotta--pretty much anything creamy or cakey.


Cut the skin and pith from the citrus and cut into supremes. Squeeze the leftover flesh to remove as much juice as possible. Strain the juice from the citrus (you should have about ½ cup) and set aside. Combine the citrus in a medium heatproof bowl and set aside. 

Combine the water and sugar in a heavy-bottomed medium saucepan. Cook over low heat, stirring to dissolve the sugar. Once the sugar has dissolved, turn the heat to medium and DO NOT STIR. (Doing so could cause your caramel to seize up.)

Cook, swirling the pan occasionally (but not stirring), until  the water has evaporated and the sugar starts to caramelize and turn medium amber in color. Very carefully, add the rum. It will splatter so stand back! Once the rum has stopped splattering, slowly add the reserved citrus juice and a pinch of salt. The caramel will likely seize up a little and look crazy. Don’t worry--simply return it to medium heat and cook, stirring often, until any hardened bits have melted and the caramel has thickened slightly, 2-3 minutes. Remove the caramel from the heat and set aside to cool slightly.

When the caramel is lukewarm or completely cool, pour it over the citrus. Set aside for at least an hour to allow the flavors to come together. 

Makes 8 servings.


Easy Candied Almonds

  • 2 tablespoons granulated sugar

  • Generous pinch salt

  • ⅛ teaspoon ground cinnamon

  • 1 tablespoon butter

  • 1 cup blanched slivered almonds

In a small bowl, stir together the sugar, salt and cinnamon.

Heat a large saute pan over medium-high heat. Add the butter and swirl to melt. Add the almonds and cook until fragrant, about a minute. Sprinkle the sugar mixture over the nuts and cook, stirring often, until the sugar has melted and caramelized and the nuts are starting to turn golden brown, about 3 minutes.

Immediately transfer the nuts to a large plate to cool. When cool enough to handle, break up any clusters. Cool completely before storing in an airtight container.

Makes 1 cup candied nuts.